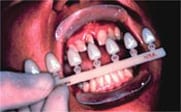
Figure 1.
Select crown.
The tooth is prepared with conventional materials and techniques. Select the proper size crown by measuring
the space of the unprepared tooth to determine the mesio-distal width and crown height.
|
|
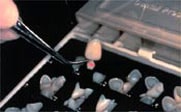
Figure 2.
Determine size and style.
Obtain the proper size crown from the numbered compartment in the kit.
|
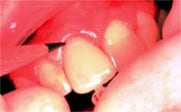
Figure 3.
Mark margin.
Seat the crown on the preparation. Mark the gingival margin with a pencil. Do not remove the identification
tag as it helps in holding and manipulating the crown.
|
|
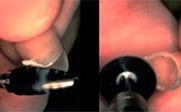
Figure 4.
Trim and finish.
Polycarbonate crowns are readily adjusted using a green stone or acrylic bur. The crowns can also be trimmed with 3M™ ESPE™ Crown Scissors. A smooth marginal finish can be obtained by using 3M™ ESPE™ Sof-Lex™ Contouring and Polishing Discs.
|

Figure 5.
Load cement.
Load the crown with a thick mix of a high compressive strength ZOE cement.
|
|

Figure 6.
Seat crown and remove excess cement.
Seat the crown on the preparation. Remove excess cement using an explorer and be certain that
all cement is removed.
|
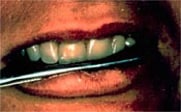
Figure 7.
Adjust occlusion.
Check the occlusion and adjust, if necessary, using stones or burs. Take care not to perforate the crown. The polycarbonate provisional restoration is completed.
|
|
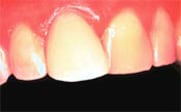
Figure 8.
Completed restoration.
Provisional restorations should provide function, esthetics, and comfort for the patient.
In addition, they should enhance the prognosis for success of the final restoration by
producing an optimal environment for the periodontal tissues and natural tooth structure.
|
Please refer to product instructions for more detailed information as well as precautionary and warranty information when using 3M™ ESPE™ materials.
|