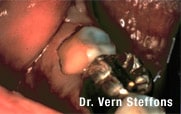
Figure 1
Prepare tooth.
Prepare the tooth using conventional techniques. The Iso-Form crowns are designed to fit easily over a feather edge or chamfer preparation, but can be easily adapted to fit over a shoulder preparation.
|
|
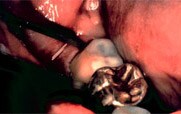
Figure 2
Measure width.
Use a boley gauge or perio probe to determine the mesial-distal width. |
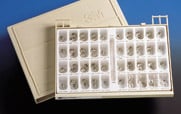
Figure 3
Iso-Form crowns are provided in a variety of bicuspid and molar shapes and sizes.
|
|
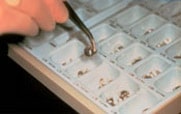
Figure 4
Based on the mesial-distal width, select the appropriate crown size from the kit. The kits provide ease in crown selection as the mesial-distal widths of the crowns are noted on the kit.
|
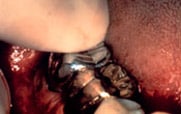
Figure 5
Trial fit.
Gently push the Iso-Form crown over the preparation. The cervical area of the crown automatically stretches over the finish line. The placement of the Iso-Form crowns is fast and simple, because the dead-soft alloy enables the crown to adapt to the contours of the preparation.
|
|

Figure 6
During the trial fit, blanching of the gingival tissues may occur.
|
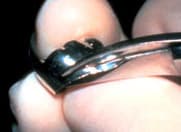
Figure 7
If blanching of the gingival tissues is observed during the trial fit, the gingival margins require adaptation. Use the 3M™ ESPE™ crown scissors to trim the cervical contours as needed.
|
|
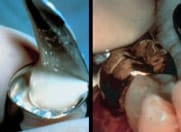
Figure 8
Load cement and seat.
Fill the crown with a high compressive strength ZOE cement. Place the crown by using finger pressure until the marginal ridges of the crown line up with the adjacent teeth.
|
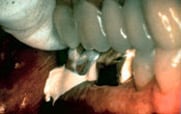
Figure 9
Establish occlusion.
Immediately have the patient gently bite down to establish the proper occlusal table, then burnish the occlusal contact areas for clearance as necessary.
|
|
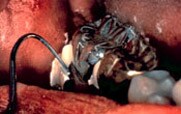
Figure 10
Remove excess cement.
Remove the excess cement with a scaler, explorer and/or dental floss. To provide optimal comfort for the patient, burnish the margins to a feather edge before the cement sets completely.
|
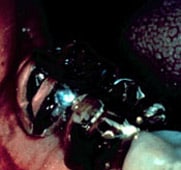
Figure 11
Completed restoration.
Completed Iso-Form crown provisional restoration.
|
|

Figure 12
If additional length is needed, the occlusal surface can be flattened by placing the occlusal of the crown on a hard surface and flattening the inside of the occlusal surface with a burnisher. Gently seat the crown with finger pressure. Have the patient gently close into occlusion to establish the occlusal table and mark contacts.
|
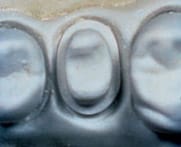
Figure 13
In the case of a shoulder preparation, use the stretch block to increase the circumference of the cervix of the crown.
|
|
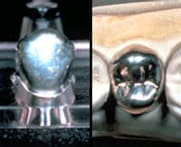
Figure 14
Gently push the crown on the stretch block to increase the circumference of the cervix of the crown.
|
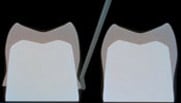
Figure 15
Burnish the margins to provide optimal gingival comfort for the patient.
|
|
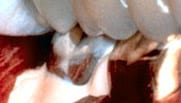
Figure 16
Obtaining occlusion is easily established. Have the patient close slowly onto the crown after it has been initially seated with light finger pressure and prior to the cement beginning to set. The dead-soft alloy of the crown allows it to conform to the required occlusal contours.
|
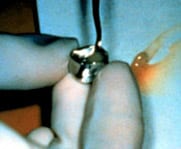
Figure 17
Acrylic liner. For additional marginal adaptation, strength and retention, an acrylic liner can be added to the Iso-Form crown. The crown should be trimmed and the occlusion adjusted prior to lining with acrylic. Cold-curing acrylic is placed into the adapted crown and the crown is seated after the acrylic surface has lost its initial gloss. Trim the excess acrylic while the acrylic is in the doughy stage. If cold curing acrylic is used, it should be removed periodically to prevent polymerization shrinkage onto the preparation and into undercuts which makes removal for finishing difficult. Moisten the acrylic with water each time it is re-seated. Iso-Form crowns are an excellent posterior crown form, simply fill with acrylic and strip after curing.
|
|
|
|