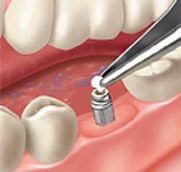
Tips for Temporization Success
|
| |
For
your success, we suggest that you start
with an easier case first.
Easy access (e.g. lower Premolar or Molar)
Sufficient residual tooth structure
Healthy tissue
 |
| |
|
|
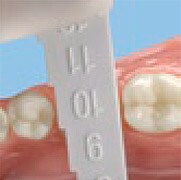
Figure 1
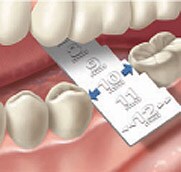
Small or large?
Start with the smaller crown.
For a snug fit, choose the smaller size.
A small crown can easily be contoured
to make it into a medium one. Use the
measuring tool and sizing chart for selection.
|
|

Figure 2
Unpack it carefully. Product should be
at room temperature.
Remove the crown from
the film by pressing gently on the occlusal
surface. Handle the crown carefully—
it is made out of composite material
and is malleable. |
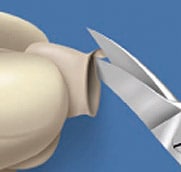
 Figure
3 Figure
3
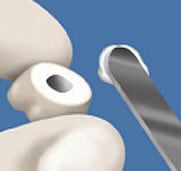
Trim the crown short rather than leaving
it too long.
Use sharp curved scissors
for trimming and follow the gingival
contour. The material can easily be manipulated
to close any gaps at the margins. Cut
a circle all the way around.
|
|
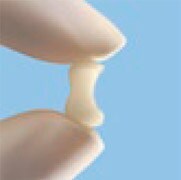
Figure 4
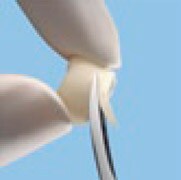
Make it U-shaped.
Further trim the crown
by cutting the mesial-distal sides into
a U-shape.
|
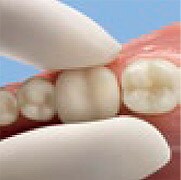
Figure 5
Gently place it on the preparation.
Be
sure NOT to push or squish the crown onto
the prep.
Do not push down on occlusal surface.
|
|
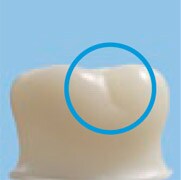
Figure 6
Position it ‘cheek to cheek’.
When placing
the crown, make sure that the side with
the so-called ‘buccal groove’ (the visible
line) is on the outside. |
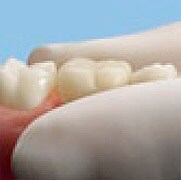
Figure 7
Align the contours.
Use your fingers
to ensure that the crown is in line with
the teeth. Gently mold the crown. Slide/stretch
it into the right position.
|
|
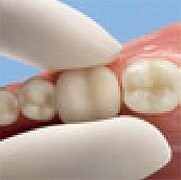
Figure 8
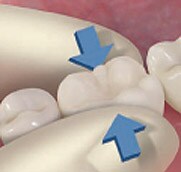
Make sure the contact areas are correct.
Establish interproximal contacts and
margins. |
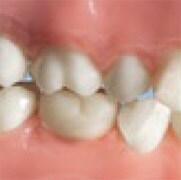
Figure 9
Slowly and gently bite into occlusion.
Establish and adjust occlusion.
|
|
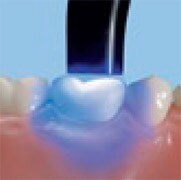
Figure 10
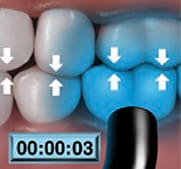
Cure (Only 2–3 seconds per surface).
Tack cure the buccal surface for 2– 3
seconds while in occlusion, then tack
cure the lingual and occlusal surfaces
2– 3 seconds each side while the mouth
is open.
|
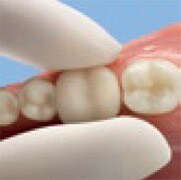
Figure 11
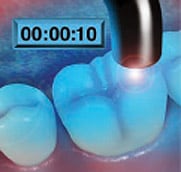
After tack cure, remove, then carefully put the crown back in place.
Do this
a couple of times to ensure fit before final cure.
|
|
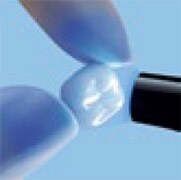
Figure 12
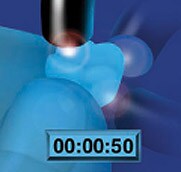
Final cure (60 seconds).
Fully cure the crown outside the mouth for 60 seconds
by turning the crown and thus exposing all surfaces to the light. Make sure to
cure the full 60 seconds.
|
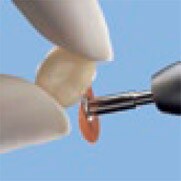
Figure 13
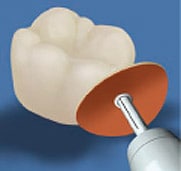
Polish and cement.
Remove oxygen inhibition layer from all surfaces with alcohol.
Polish crown and roughen inside prior to cementation.
|
|
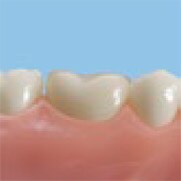
Figure 14
Final crown.
Experience the natural aesthetics and perfect fit of Protemp™ Crown
Temporization Material.
|
| |
|
|
| Please
note that this information contains only Tips
for Success for a correct and successful
usage of Protemp™ Crown Temporization
Material. For complete and detailed instructions,
please refer to our Technique Guide. |